METEOR-M (METEOR-M N2-3, METEOR-M N2-4) satellites reception
Also available in: Italiano 🇮🇹
Introduction
The METEOR-M series of satellites allow you to receive excellent images with very little effort.
However, the guides available on the Internet are several years out of date and all recommend very convoluted software setups, often using very out of date or even abandoned software, which makes this simple task appear much more complicated than it really is - and believe me, it isn't hard at all!
A lot of people think that LRPT is much harder to decode than APT, but this couldn't be farther from the truth! The digital signal has error correction built in, which means that you will always get the best image quality if the signal is sufficient - there will be no banding, fading or "snow" effect as with analogue systems.
I've written this guide in the hopes of avoiding all the trouble I went through due to outdated documentation!
The satellite
The METEOR satellites are a series of sun-synchronous, polar-orbiting satellites that orbit the Earth at around 800 km above the ground. Their orbit is chosen so they pass over the same ground location at roughly the same solar time each day, twice per day.
Two satellites are currently operational in the LRPT mode: METEOR-M N°2-3 and N°2-4
METEOR-M N2 was decommissioned in January 2023 following a failure in its attitude keeping system, and METEOR-M N2-2 is now on standby duty (no signal transmission).

| Satellite | Frequency | Mode | Bandwidth | Polarisation |
|---|---|---|---|---|
| METEOR-M N°2-3 | 137.9 MHz | OQPSK 72k | 100 kHz | RHCP |
| METEOR-M N°2-4 | 137.9 MHz | OQPSK 72k | 100 kHz | RHCP |
Signal description
The images of METEOR-M satellites are broadcast using LRPT (Low Rate Picture Transmission), a digital scheme that uses PSK modulation (more precisely, QPSK for METEOR-M N2 and OQPSK for later satellites). The data rate is 72 kbit/s, which is sufficient for three channels of JPEG compressed imagery.
Hardware
SDR
Any SDR will do, provided it's of good quality. The usual choice is a RTL-SDR dongle.
Stay away from the blue RTL-SDR dongles! These often contain the dreaded Fitipower FC0012 tuner chip, which is very insensitive and will likely yield very poor results. These dongles also overheat very easily, even if they have the suitable Rafael Micro R820T/T2/R860 chips. It is best to avoid them if you don't already own one.
I recommend the RTL-SDR V3 that can be found on Amazon and on eBay. Another good dongle is the Nooelec NESDR SMArtee.

Beware of fake dongles, always buy on official stores only.
WARNING: If you'd like to use a filtered LNA, as detailed in the next section, you need to think a bit about how to supply power to the LNA, and that is either:
- Via an USB cable
- Via the bias tee (power supplied from the SDR over the antenna cable
If you'd like to supply power using the bias tee, the SDR must support the bias tee function. The RTL-SDR V4, V3 and Nooelec SMArtee have a bias tee, but the Nooelec SMArt does not (note the missing "ee" at the end of the name).
Other SDRs can be used of course, such as the HydraSDR RFone, SDRplay and many more. These dongles do perform better especially with heavy interference, but are also much more expensive.
Antenna
General discussion
The METEOR satellites transmit in the VHF band, which means that they can be received with very little difficulty almost anywhere.
The most important parameter is not the antenna, and neither the SDR. It's the line of sight! It goes without saying that the best spot to receive LRPT is a mountain top, followed by any sufficiently flat and sparsely populated location such as farm fields.
Being far away from population centers also helps, because switching power supplies, LED lights and powerline communications all produce nasty interference that will greatly hamper LRPT reception, especially for a beginner.
Once you are confident with the work needed and you got a few images from those ideal locations, you can try from any location with a sufficiently clear view of the sky, such as a city park or rooftop.
I received excellent images from the most disparate locations, including railway stations, bus stops, schools, beaches, parking lots, castles, monuments and even on a kayak! The LRPT signal quite strong and can be received easily even with the most rudimentary of equipment at practically any location, making it a fun activity to do "on the go", for example while you wait for your train or bus and a satellite happens to pass overhead.

Just make sure to never position yourself close (~1km | ¼mi) to a FM broadcast transmitter, or the resulting noise will make it impossible to receive anything because of SDR overload.
Types of antennas
There are a few antenna types that can be used to receive Meteor LRPT signals:
- V dipole antenna
- QFH (Quadrafilar helical) antenna
- Turnstile antenna
- Yagi-Uda directive antenna
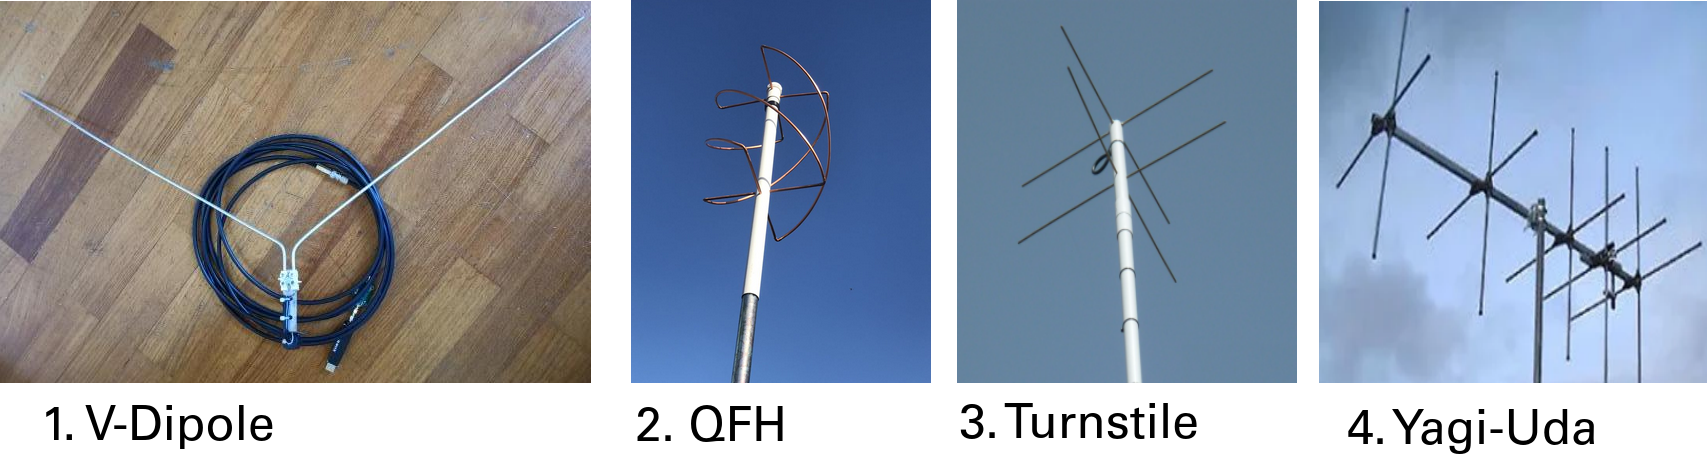
I strongly recommend beginners to start their receptions using the V dipole, which is very simple to construct and extremely cheap. It is also portable, and there isn't much to go wrong with it.
More advanced users, such those wishing to build an automated station will find the V dipole is very unsatisfactory for a permanent installation. For these, I strongly recommend a QFH antenna. Tutorials for building a QFH antenna are available, however keep in mind that building a QFH that works somewhat is simple, but building one that works well is very difficult and requires access to a Vector Network Analyser (VNA) for tuning. You can buy a ready-made one from FT8.co.uk at a very reasonable price, or from Wimo. These links are not affiliated, and are only here for your convenience.
An important note on METEOR-M N°2-3
Due to a very long storage time caused by the COVID-19 pandemic among other things, METEOR-M N°2-3 has suffered an antenna deployment failure.
The LRPT antenna failed to properly deploy and rests in a tilted position, which means the radiation pattern is not uniform and this causes a lot of fading and alternates between weak and very strong signals.
Therefore, a QFH antenna being omnidirectional, is not really recommended for METEOR-M N°2-3 work, because it will not perform as good as on NOAA satellites (or METEOR-M N°2-4 and future ones).
A V dipole on the other hand, is not perfectly omnidirectional. Hence, by holding it in your hand and adjusting its orientation and height above the ground as the satellite moves, it is possible to compensate (to some extent) for the misaligned transmitter antenna.
Other directional antennas such as a Yagi-Uda will work even better, but are both a lot bulkier, more unwieldy and harder to build and therefore I don't recommend those to a beginner. And naturally, for a permanent/automated station, the QFH will be the only valid choice unless you also have an antenna rotator.
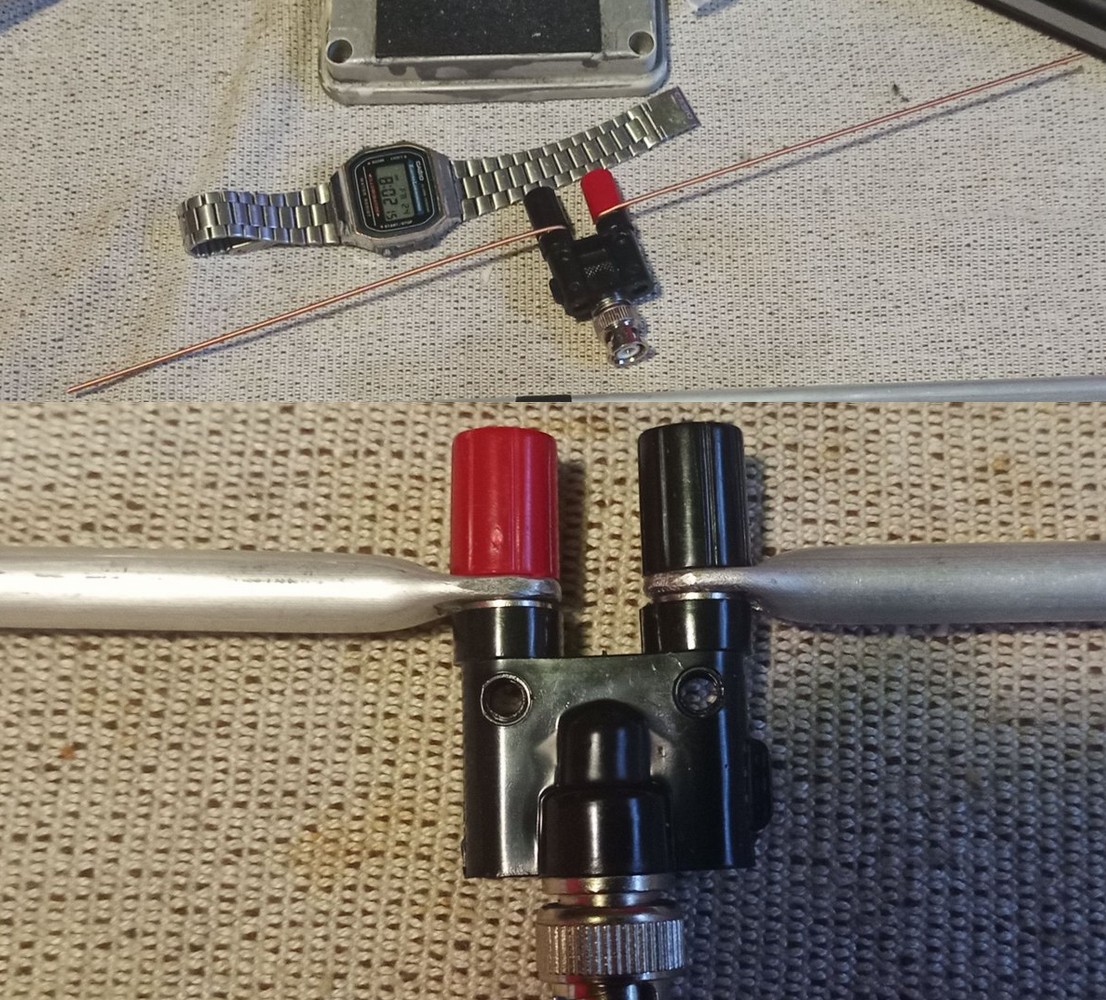
V dipole dimensions and construction tips
These are the dimensions of the V dipole. I've used 3 mm aluminium rods, cut and bent to shape using pliers. Then, a "chock block" (electrical terminal block) is used to secure and attach them to the coaxial cable.


Another good idea (thanks @CBAerial) is to use a BNC to banana plug adapter. Aluminium rods can then be secured to the banana plug (5mm tubes can also be used, by crushing their end and making a hole in the center of the crushed part), and a BNC to SMA cable or adapter can be attached to the other end. This approach is neater than using a terminal block.
LNA
A filtered LNA (or even just a filter paired with a wideband LNA) is of great help when receiving LRPT.
While LRPT receptions can (and should, if you've never tried before!) be attempted even with just the SDR alone, they usually won't be great, unless done in an interference-free environment such as a natural park, mountain or field. Attempting a reception without LNA in inhabited areas, such as a city or village, will usually result in disappointing results.
Fortunately, the Chinese have produced excellent low-cost combination filter and LNA boards that can be found on Aliexpress.
As the listings change rather quickly, links can get broken. If the link doesn't work, try searching for 137 MHz SAW amplifier will get the good listing likely. The looks of the LNAs are detailed below.
Beware that only the LNAs with a filter marked 1581 are suitable (137 MHz SAW), the other ones are for ADS-B and other frequencies!

These LNAs will need to be supplied with power: both Micro USB as well as bias tee (power supplied by the SDR) can be used. Usually a blue LED lights up to confirm the LNA is being supplied with power.
If you already have a wideband LNA board, such as SPF5189z, PGA103 etc., you can just buy the SAW filter alone and add your LNA before the filter.

I don't recommend buying the Nooelec SAWbird+ NOAA, as it has several design flaws that make it nearly useless.
Software
Most of the guides on the Internet recommend using SDR# and a bunch of outdated and Windows-only software. However, all that can be replaced by the much easier and multiplatform SatDump by Aang23 and several others.
Setting up SatDump
- Open SatDump and go to the
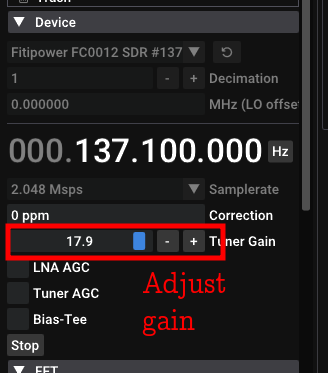
Recordertab. - Select your SDR and adjust the gain.
- If you don't have any LNA, the gain of the RTL-SDR will likely need to be set to almost the maximum.
- If you do have an LNA, such as the Aliexpress SAW units, a gain of 25 on the RTL-SDR will do the trick.
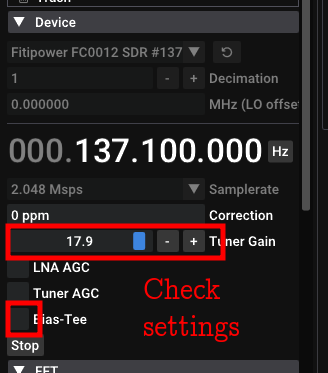
- Make sure you have enabled bias tee if you're using an LNA that receives power by the SDR, such as the Aliexpress SAW LNAs.
- Select the sample rate. Usually
1.024 Mspsis enough on RTL-SDR. - Click on
Start. - Open the
Processingpanel, and search for LRPT. SelectMETEOR M2-x LRPT 72k, and check theDC Blockingbox. - Select
Primaryfor 137.9 MHz, andBackupfor 137.1 MHz. - If you want, you can open the
Trackingpanel, and search forMETEOR-M2 3. This will give you some more information on the satellite passing above you, such as when it will rise (called AOS) and set (called LOS), as well as its position in the sky.
For testing mode on newly launched Meteors, you might need to select
METEOR-M2-x LRPT 80kif the signal doesn't sync.

Pass prediction
I recommend using Look4sat on Android phones to predict when the satellite is going to pass over your location. Alternatively, Orbitron and GPredict are also excellent if you prefer to have the software installed on your PC (or don't have an Android phone).
I am not aware of any good pass prediction app on iOS, the closest being PulseSat but with severe drawbacks, most importantly it being extremely slow to start. As an alternative, the website N2YO can be used from the browser instead.
Receiving the image
When the satellite comes into your line of sight, the signal (a bump) will appear on the waterfall. Press Start and the demodulator will start working.
If you don't see anything, make sure you have raised the gain of the SDR! Also, if you use an LNA from Aliexpress, you need to enable the Bias Tee.
You can adjust your tracking with the SNR meter if you're using a handheld V dipole. If the Viterbi is locked, and the numbers after RS (these are the Reed-Solomon error correction blocks) are either yellow or green, everything is good and you are receiving a perfect image!
If Viterbi unlocks, it means the SNR went too low. Don't worry, it will not ruin the whole image - there will be only a black line when the signal wasn't strong enough.
When the satellites goes away, first click on Stop in the Processing tab, then click Stop in the Device tab. Do not close SatDump, as it will start processing data in the background!
If you did close SatDump, it's not a big deal. Here's how you fix it:
- Go to the
Offline processingtab.- Search for
METEOR-M2-x LRPT 72kand select it.- In the
Input filefield, select the.cadufile you find in thelive_outputfolder of SatDump. If you don't know where is that folder, you can find it in theSettingstab (and change it if necessary).- In
Output directoryselect an empty directory to output files in.- In
Input level, selectcadu. Leave everything else as is.- Press
Start.For testing mode on METEOR-M N°2-4, you might need to select
METEOR-M2-x LRPT 80kif the signal doesn't sync.

Decoding and processing data
You can retrieve the images both in the selected Live Processing Directory (if you don't know its location, you can find it as well as adjust it to your liking in the Settings tab) as well as in the Viewer tab.
With the Viewer, you can produce composite imagery according to your preferences, as well as combine it with additions such as cities markers, shorelines, borders, latitude and longitude grids, and much more.

Advanced method using SDR++ and SatDump together
This method is not as useful as it was in the past, as APT satellites are not transmitting anymore. It remains here for historical reasons.
This method makes use of SDR++'s demodulator to demodulate the signal, and SatDump to process the data.
While it is more complicated, it allows you to receive METEOR together with another APT satellite that might be passing at the same time (NOAA POES satellites sometimes overlap with METEOR).
- Open SDR++ and select your SDR.
- In the
Module Managerpanel, enable and give a name to theMeteor Demodulatormodule. It will appear as another panel at the bottom left corner of your screen (you might need to scroll). - Enable the newly added panel by ticking its box. A new VFO (filter) will appear in the FFT spectrum panel.
- Click on the new VFO and then drag it to the correct frequency (or type it in) for METEOR - usually 137.9 MHz.
- Click on the old VFO, and then drag it (or type) on the frequency of the NOAA satellite.
- Check the OQPSK mark on the Meteor Demodulator.

- When METEOR comes into your line of sight, push on Record below the OQPSK checkmark.
- When the NOAA satellite comes into your line of sight, press Record in the usual recorder as detailed in the NOAA POES reception guide.
- Stop the recording using the appropriate button when either satellite goes out of sight.
Data processing
APT can be processed with the methodology explained in the NOAA POES reception guide.
METEOR data needs to be fed to SatDump in this way:
- Go to the
Offline processingtab. - Search for
METEOR-M2-x LRPT 72kand select it. - In the
Input filefield, select the.sfile you got from SDR++. It will be in the same directory as the APT recordings. - In
Output directoryselect an empty directory to output files in. - Select
softin theInput Levelfield. Leave everything else as is. - Press
Start.
After it is done, you can process the image as previously explained.

Common pitfalls
-
If you cannot see the signal at all:
- Check that the cables are securely connected
- Check that you have raised the gain enough.
- Check that you have enabled bias tee, or that the LNA is being powered externally
- Check that the SDR is working. Usually, waving the V dipole around should show some difference in the spectrogram and waterfall. If nothing changes, re-check the LNA power and connections.
- Check continuity with a multimeter, to ensure the inner conductor didn't break (it can break if the cable is bent too much)
-
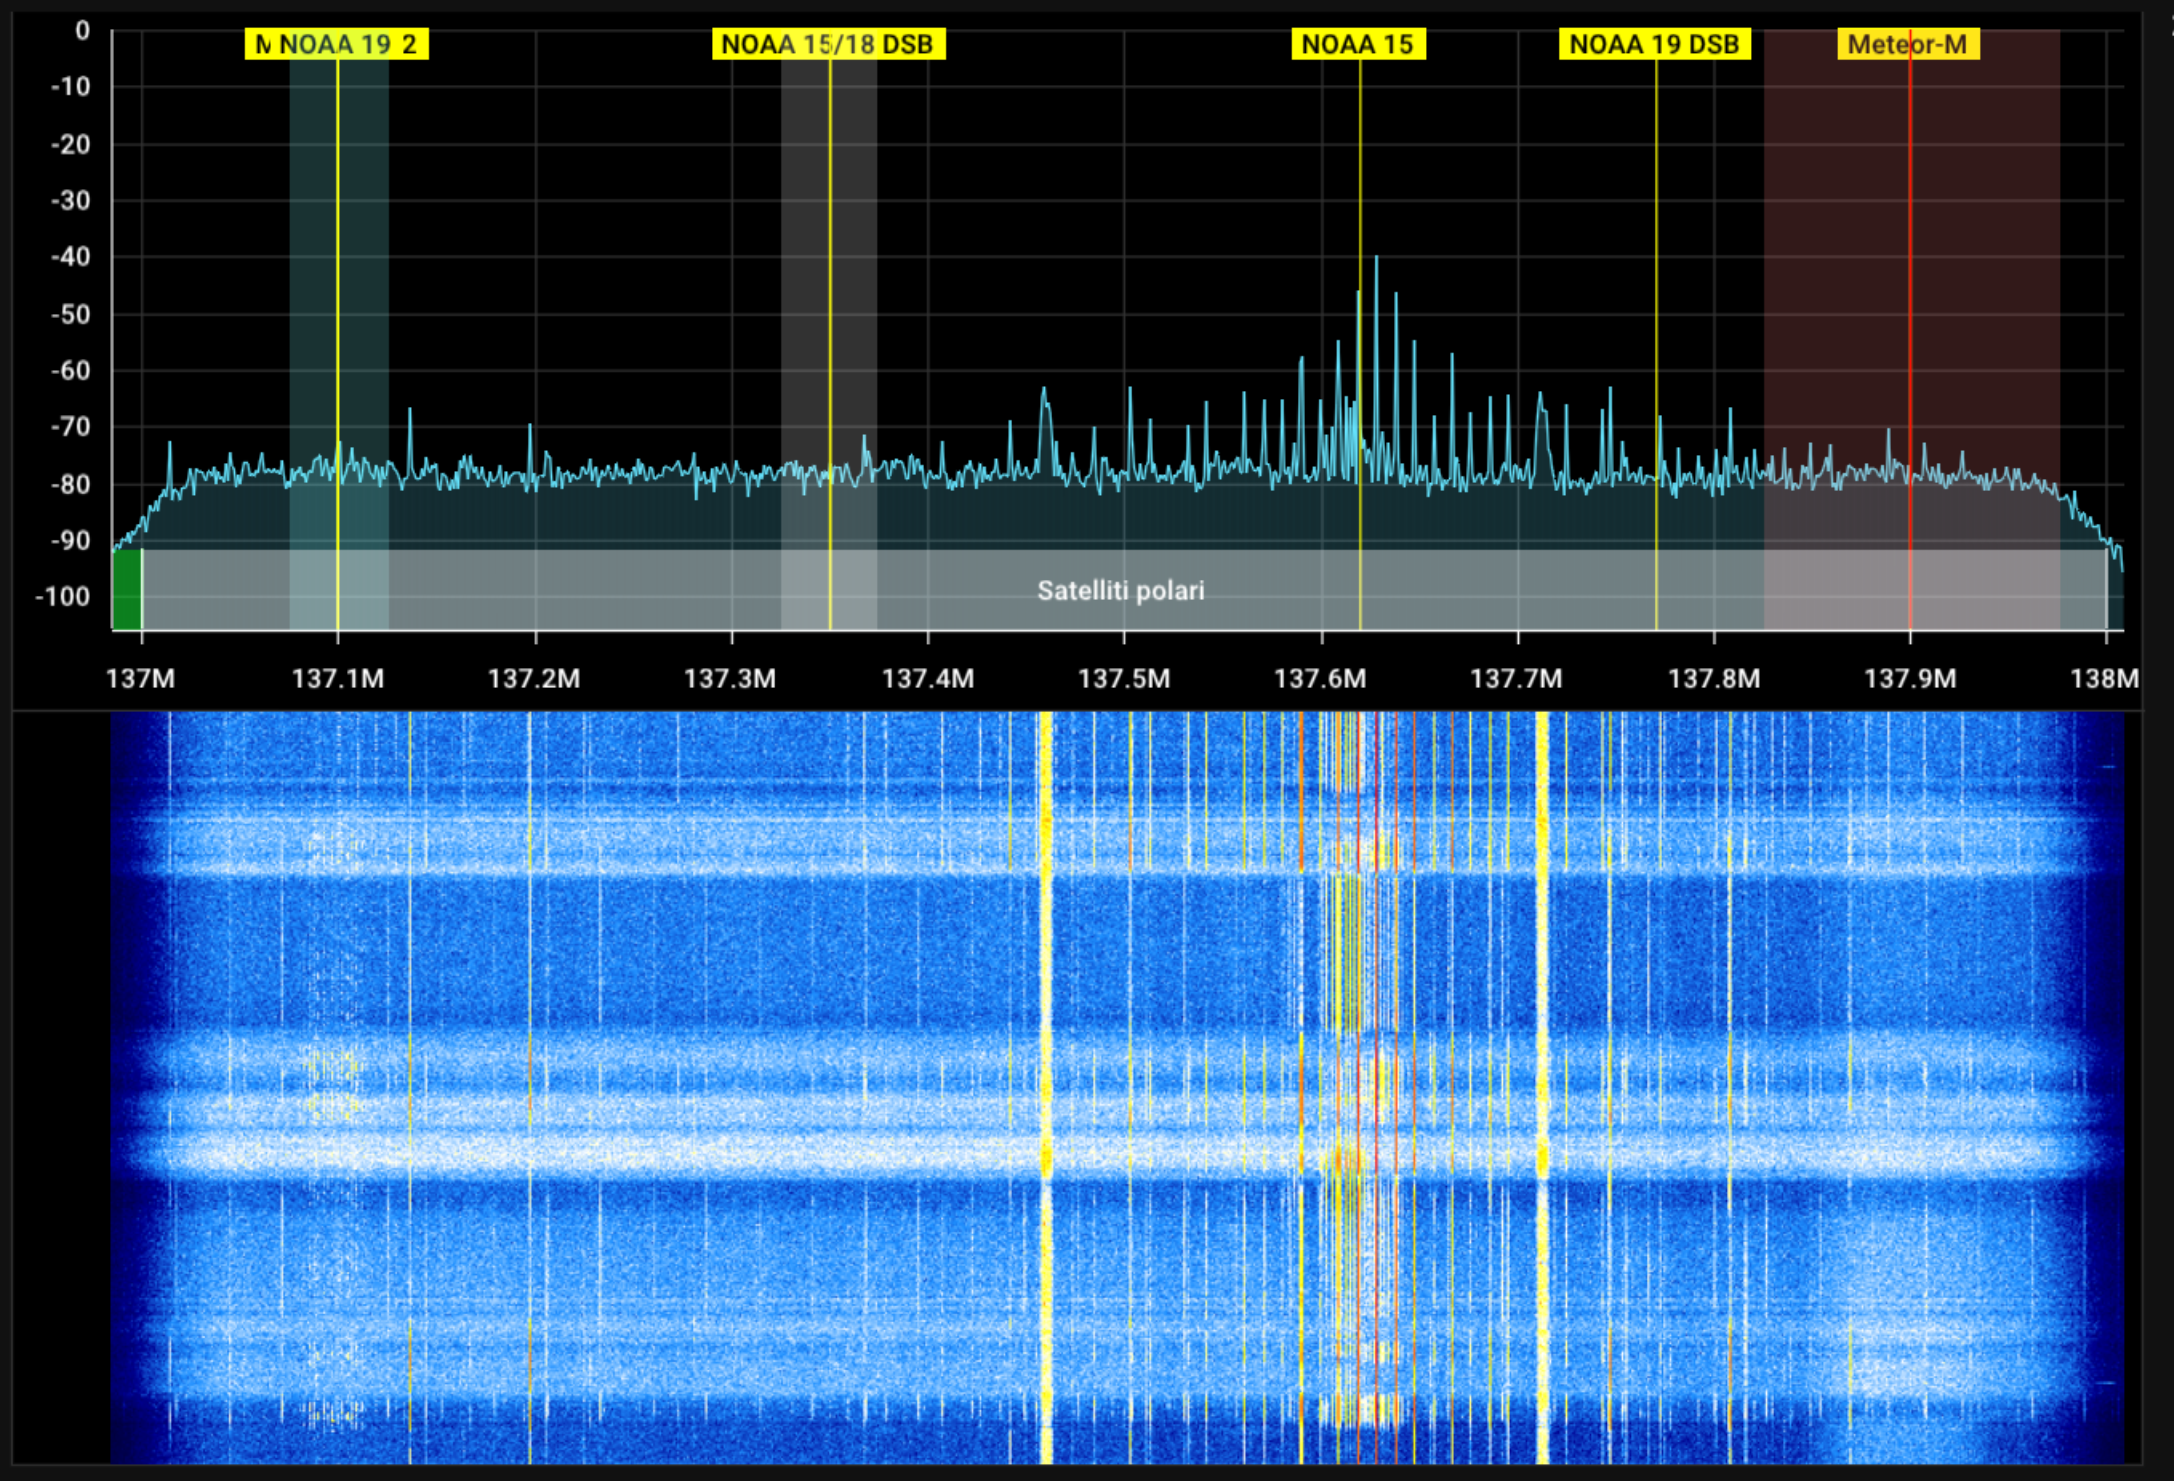
If you can barely see the signal, and the spectrogram looks anything but flat, like in the example below, you are suffering from interfence.
- Move to a quieter place, such as in the outskirts, near farmland or other sparsely populated areas
- Purchase a filtered LNA with a SAW filter
-
NEVER attempt to Doppler correct the signal using Orbitron's or Gpredict's transponder feature. The (O)QPSK demodulator uses a Costas loop to compensate for frequency differences, and altering the frequency externally will make the Costas loop unlock momentarily, causing a loss of data.
-
NEVER use RTL AGC or Tuner AGC. These AGCs are designed for very wide signals such as DVB-T. The gain control will not "see" the LRPT signal as it's much too narrow, which will result in much higher gain than normal being applied, reducing the signal.
-
NEVER use the
250 kspssample rate on RTL-SDR, as this mode has bugs and that will result in severely degraded receptions.
Automating the reception
If you wish to build an unattended automated weather satellite station, you can check out my guide here.
Have fun with LRPT!
Version: v1.0.1